In the fall of 2012, Valve head honcho Gabe Newell announced that Valve would be delving into hardware, and that Steam would directly compete with consoles for a place in the living room. The revised interface would be entirely controller based, removing the need for the traditional keyboard and mouse duo, yet keep the incredible versatility of the Steam platform.
Fast forward to 2016, this vision is slowly but surely coming true. To test it, I’ve decided to take the plunge and build my very own Steam Box. You’re probably wondering: Don’t you mean Steam Machine? Well, yes and no, I’ll explain in a bit, but first things first.
Why Steam?
2016 is turning out to be a great year for living room gaming. The PlayStation 4 and Xbox One are getting warmed up and the upcoming game releases on both sides are making geeks worldwide squeal in excitement. Even Nintendo is announcing a new console. So why am I wasting my time with a Steam-based one?
1. Steam is resistant to console exclusives.
Street Fighter V is only available on PS4, Rise of the Tomb Raider is only available on Xbox One. Guess what? They are both available on Steam. Sure, you won’t be able to lay your hands on some true exclusives like Halo and Uncharted, but in the war of consoles, the Steam box seems to be in the best position to land the largest amount of games.
2. On good hardware, games look so good on Steam.
According to this chart on IGN, most games are running at sub-1080p resolutions at 30 frames per second (fps) on PS4 and Xbox One. You can also find several side-by-side graphic quality comparisons on YouTube that shows that games are probably set to low or medium graphic quality to maintain those framerates. In short, if you invest in your Steam Box hardware, your games can look amazing by comparison.
3. Steam games are cheap.
Between insane Steam sales and grey market vendors, games on Steam are among the cheapest available anywhere right now. I bought Mortal Kombat X for $11 and Batman: Arkham Knight for $15 on G2A.com to test the Steam box. The same games on PlayStation Store costs $71 and $77 respectively.
4. Retro games on Emulators.
There has been much disappointment over the PS4’s and Xbox One’s lack of backwards compatibility with games from previous generations of their platforms. At the moment, gamers can only purchase ported versions of older games from the online stores of the consoles, and even then, there aren’t many titles available. With the Steam box, you just need to download an emulator, copy your old PlayStation or PlayStation 2 discs into an ISO format, and you can play them on your Steam box, simple.
Building the Steam Box
Back to the question of why I call this a Steam Box instead of a Steam Machine. Well, according to Valve’s description of the Steam Machine, it must utilize both SteamOS and a Steam Controller for navigation, and I’m using neither. I’m not using the SteamOS because not all games support it and games generally work prettier on DirectX, a graphics API proprietary to Microsoft, and only available on Windows. The reason why I’m not using Steam controllers is… I have a few 360 controllers handy and wanted to save money.
I’m cheap, deal with it.
The plan was to build a box that runs Windows 10 for DirectX 12, but boots directly into Steam Big-Picture mode instead of Windows Explorer so I only ever need a 360 controller for navigation, just like an actual console. Without further ado, let’s get to work.
Salvaging parts for cost savings
Being the cheapskate I am, I looked around the house for spare parts I could save money on. I found my old Aftershock X15 laptop that I bought some 4 years ago.
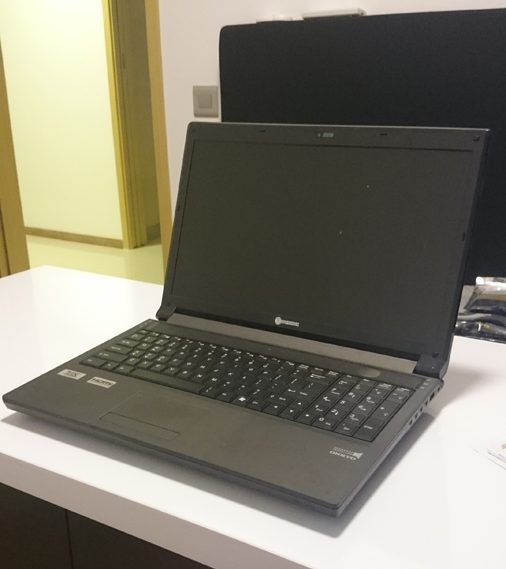
Like other pieces of tech I’ve forgotten around the house, it’s still in good working order, just… neglected. Let’s see what I can salvage from this machine: A Core i5-3210m processor, 2 sticks of 4GB Ram, 2 Hard Disks, a mini PCI Express Wireless/Bluetooth card, and a Radeon HD7970m MXM graphics card. Not a bad haul.
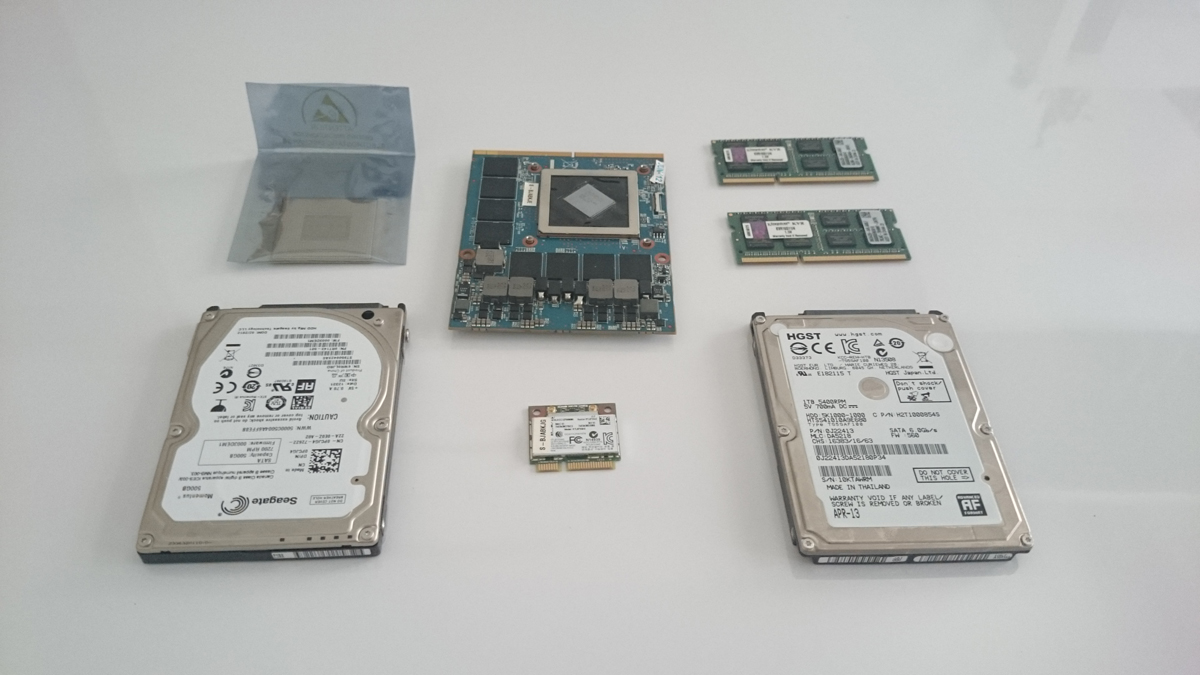
I figured I’ll be able to reuse the processor and the memory sticks. The two hard disks and wireless card are stored away for future use (extra hard disks are always useful), and I sold the dated 7970m card on eBay for a nice US$225. Moving on.
Purchasing the parts
Deciding on the case took the longest. I was determined to get a case that would fit in seamlessly with my living room’s décor – the case must be small enough to pass off as a console, yet big enough to hold all the components I’m looking for in my Steam Box. Boxes that made the shortlist, but was still too big for my liking were the Fractal Design Node 202 and Silverstone Raven RVZ02. Another case that was shortlisted but eventually dismissed was the NFC Systems S4 Mini – it had the right size, but was designed for vertical placement rather than the horizontal orientation I was looking for.
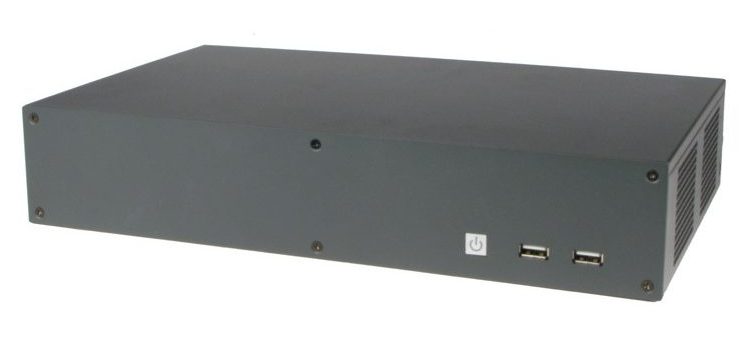
The case that eventually made the cut was the subtle, yet functional, Logic Supply MC600. I’m a big fan of its simplicity and no-frills interior. Do note that it’s an industrial case made of steel, and might be a little harder to mod than most aluminium consumer cases. I also purchased a PCI Express flexible extender to fit a graphics card into this case.
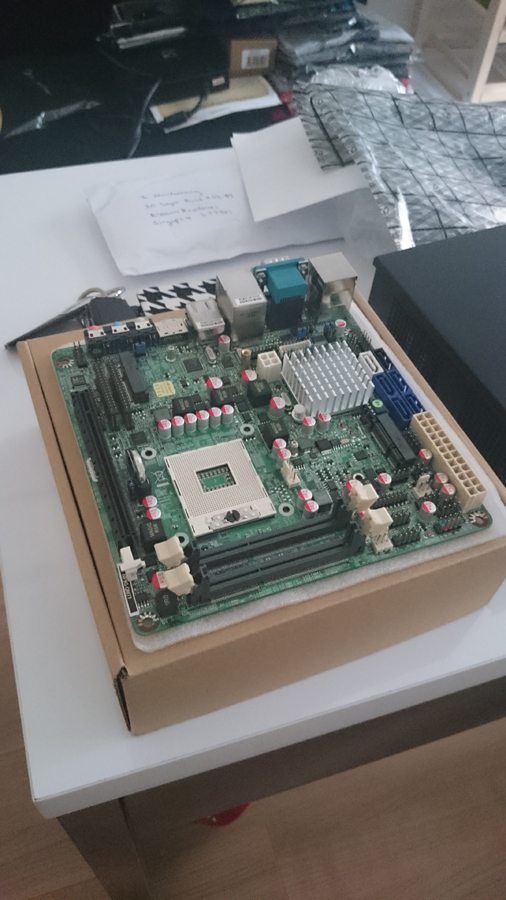
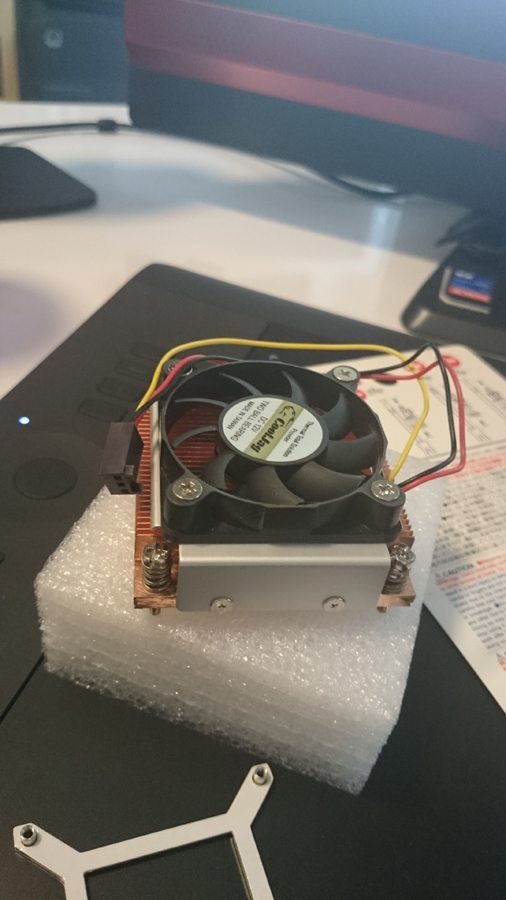
With the salvaged Ivy Bridge processor from the Aftershock, I needed a motherboard that would work with it. Paired with the requirement for a mini-ITX form factor, there weren’t that many choices. I went with the cheapest of the bunch – an Intel QM77 based Jetway NF9G-QM77 from NewEgg. I didn’t really trust the stock CPU cooler that came with the board, so I also purchased a copper cooler from Logic Supply to keep everything cool.
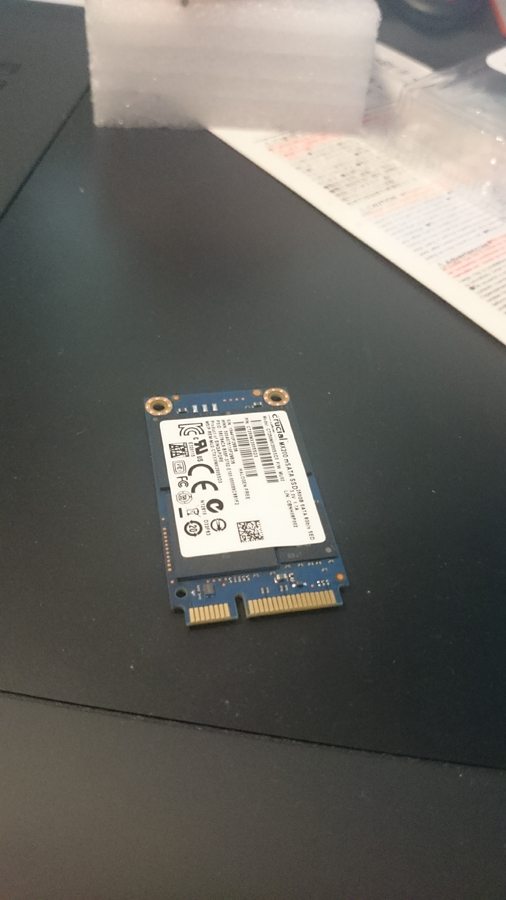
I didn’t expect there to be much wriggle room within the tiny case, and I definitely didn’t want a 2.5” SATA drive to cramp it even more, so for storage, I went with a tiny 250gb mSATA solid state drive from Crucial.
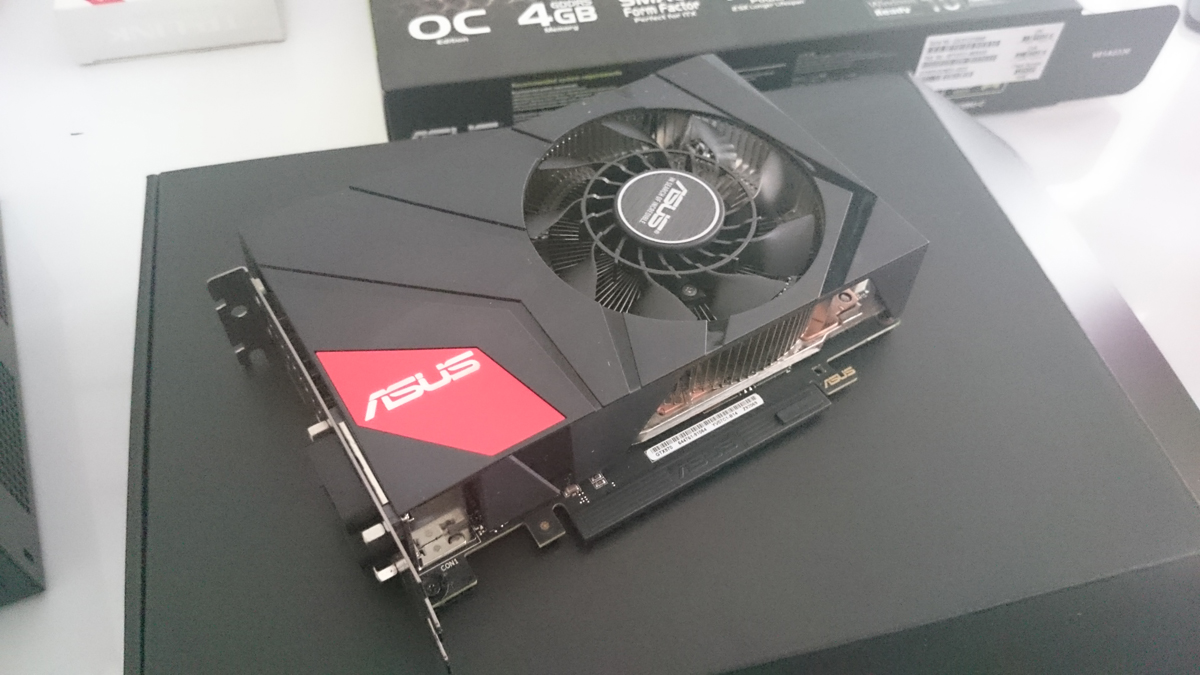
For graphics, the case only accepted graphics cards at or below 17 cm in length. At the time of this article, the most powerful cards in that size were the NVidia GTX970 and the AMD Radeon R9 Nano. Based on reviews and price over performance considerations, I went with the slightly weaker 970 over the way more expensive Nano.
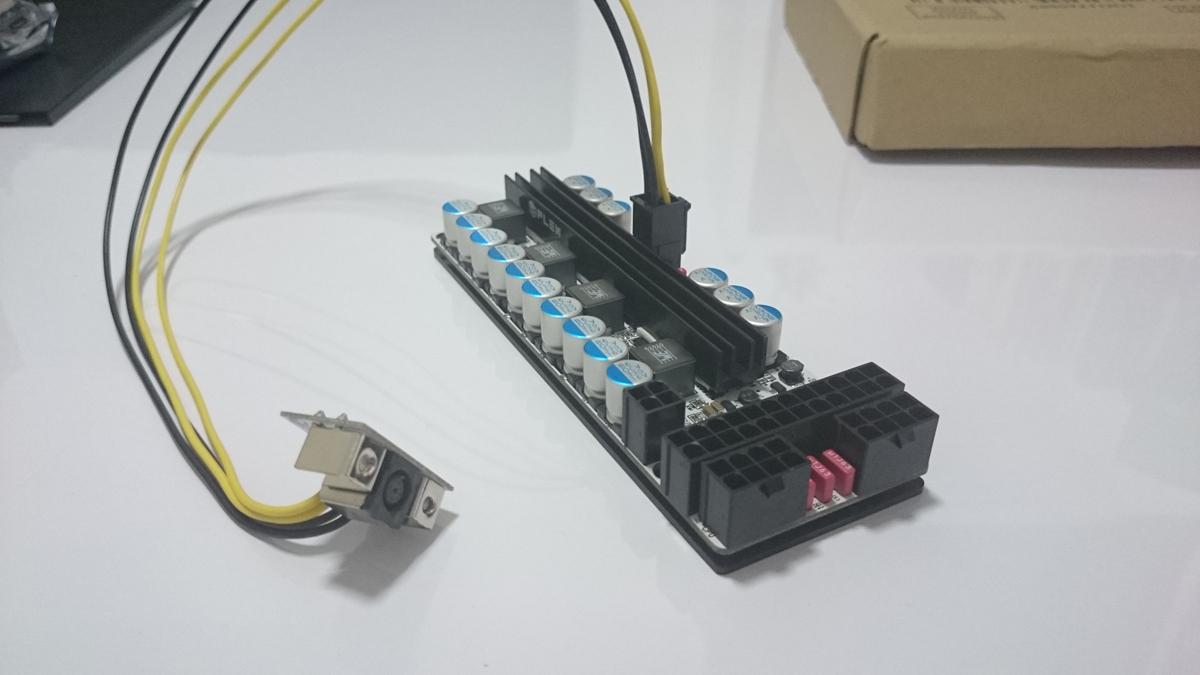
To power all of these components, I needed a decent power supply unit. Because there was no space whatsoever inside the case for a full sized ATX or even SFX power supply, I had to go with a DC one. This basically means I can’t just plug the machine into the mains, I had to get a power brick to convert the AC current from the mains to a DC one before feeding it to the machine, similar to how laptop power works.
I set out to purchase the HDPlex HiFi 250W (400W peak). Considering the low power draw from my mobile CPU (35W), most of the power will probably stem from the graphics card. According to some tests, the 970 averages around 200W of power drawn during gaming use, with some very rare spikes going up to 300W, which sits just nicely within the means of the tiny HDPlex. Now, I also need a potent power brick to feed the HDPlex, so going with my previous estimates, I bought the Voodoo 350W power brick from a local vendor.
Putting the box together
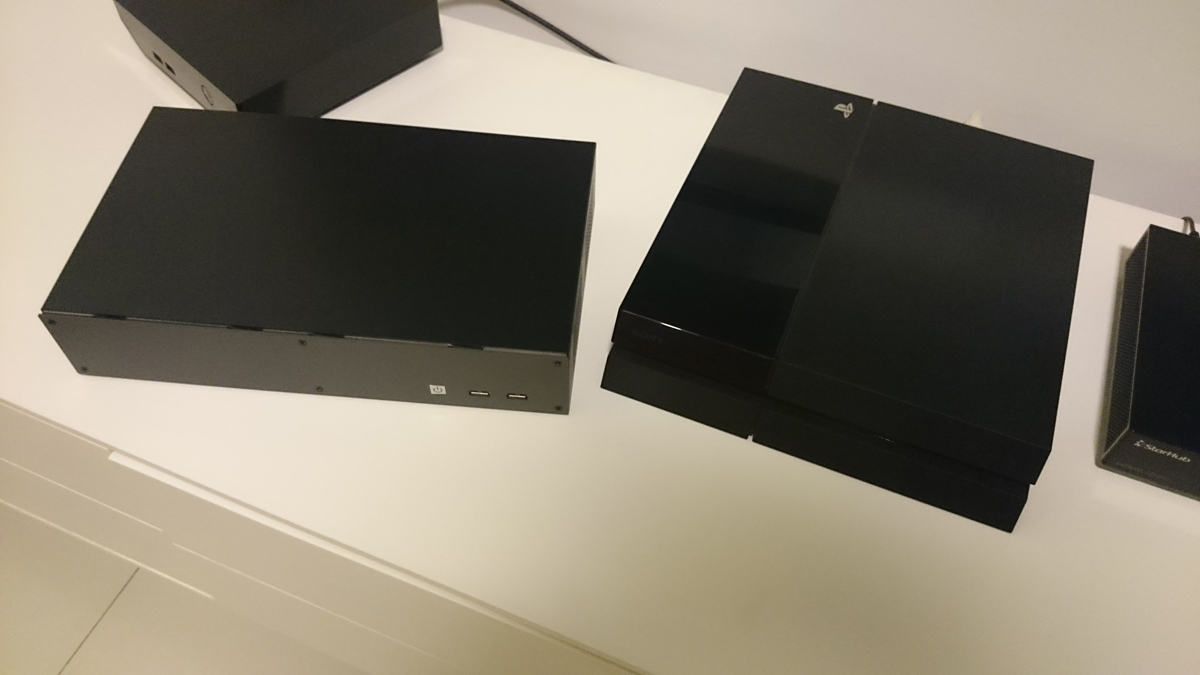
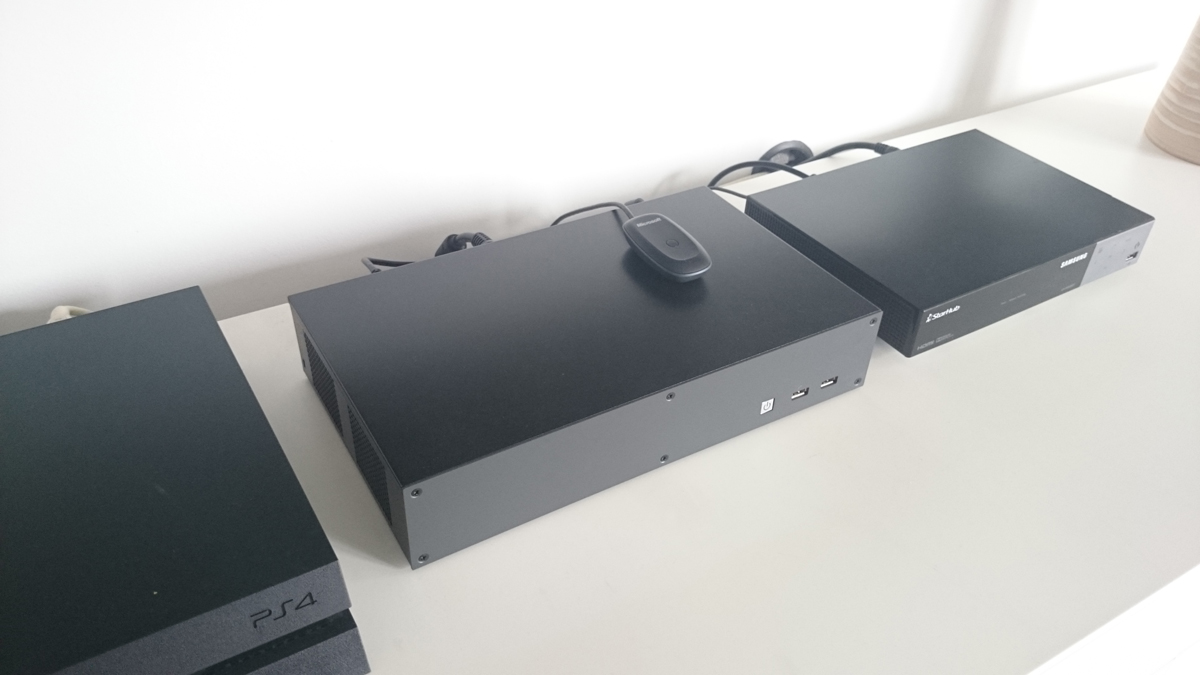
First item that arrived in the mail was the case. Such a beauty, here are some shots of the interior and the size comparison to a PS4.
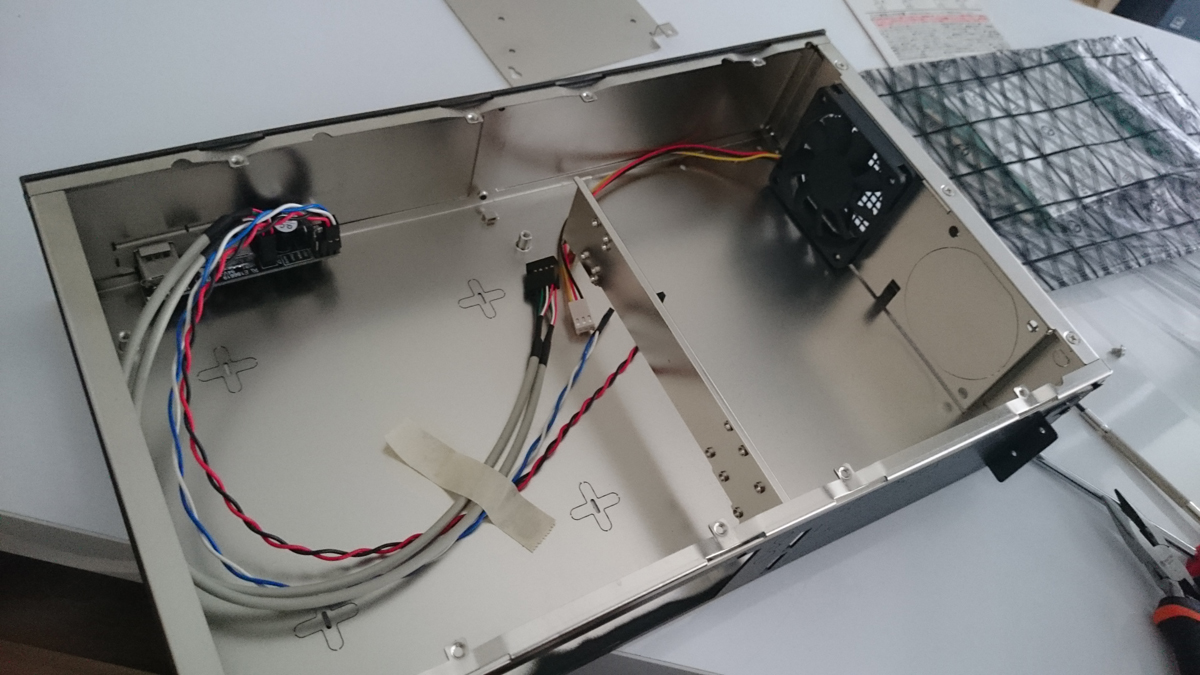
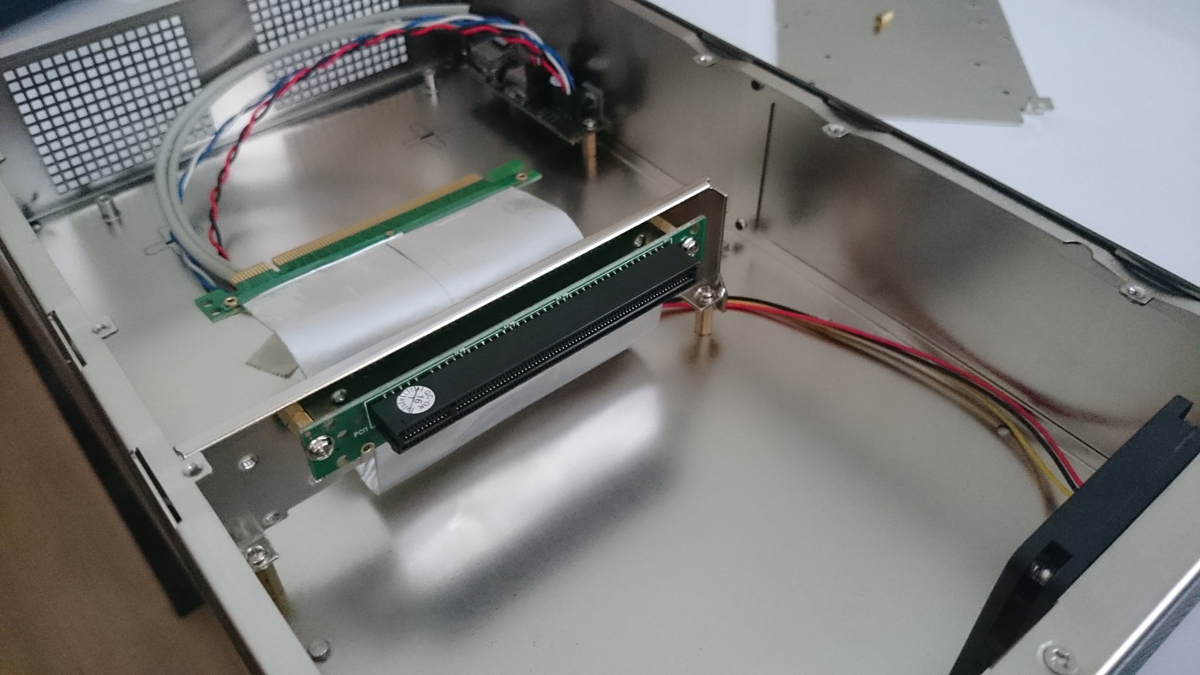
Second item to arrive was the power supply, which was a blessing because, as it turns out, the case didn’t come with the proper screw holes for mounting the DC power jack. Some drilling was required to get the DC power jack mounted. A little troublesome because the case is made of plated steel, but we got it done, just in time for the rest of the parts.


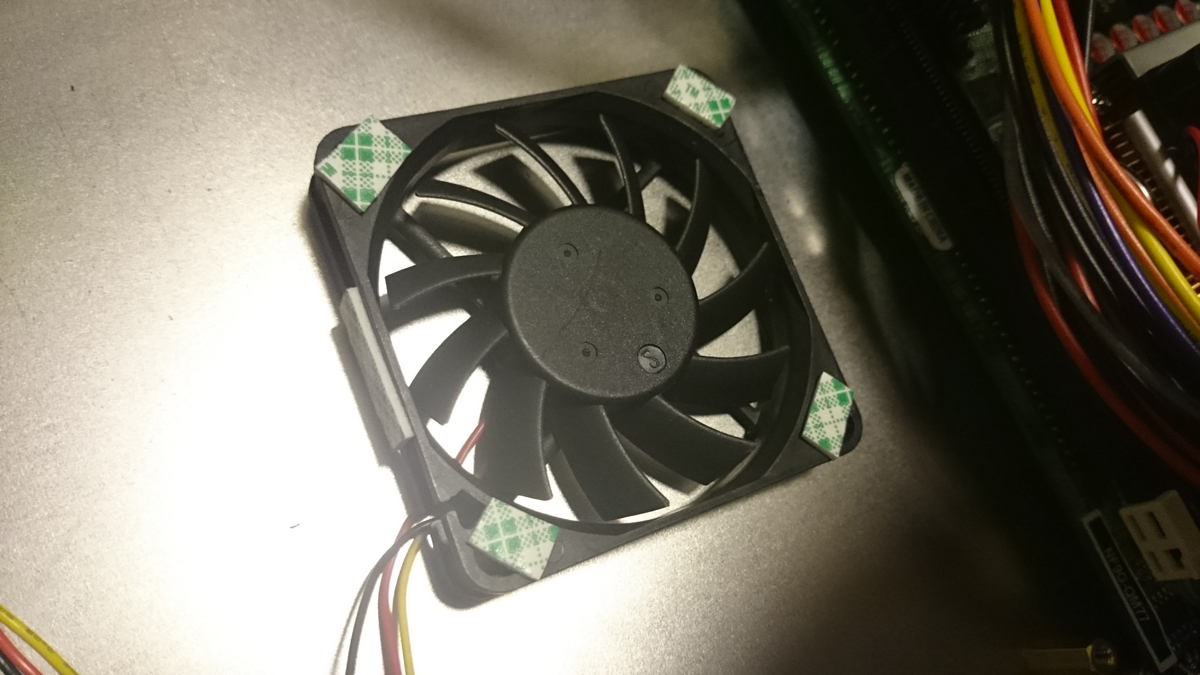
Test fitting the graphics card revealed that the 6-pin PCI power connector powering the card was blocking the screw mounts of the case fan. That’s a pickle. I ended up removing the fan mounts and mounting the fans with 3M mounting tape instead. The card now fits like dream.

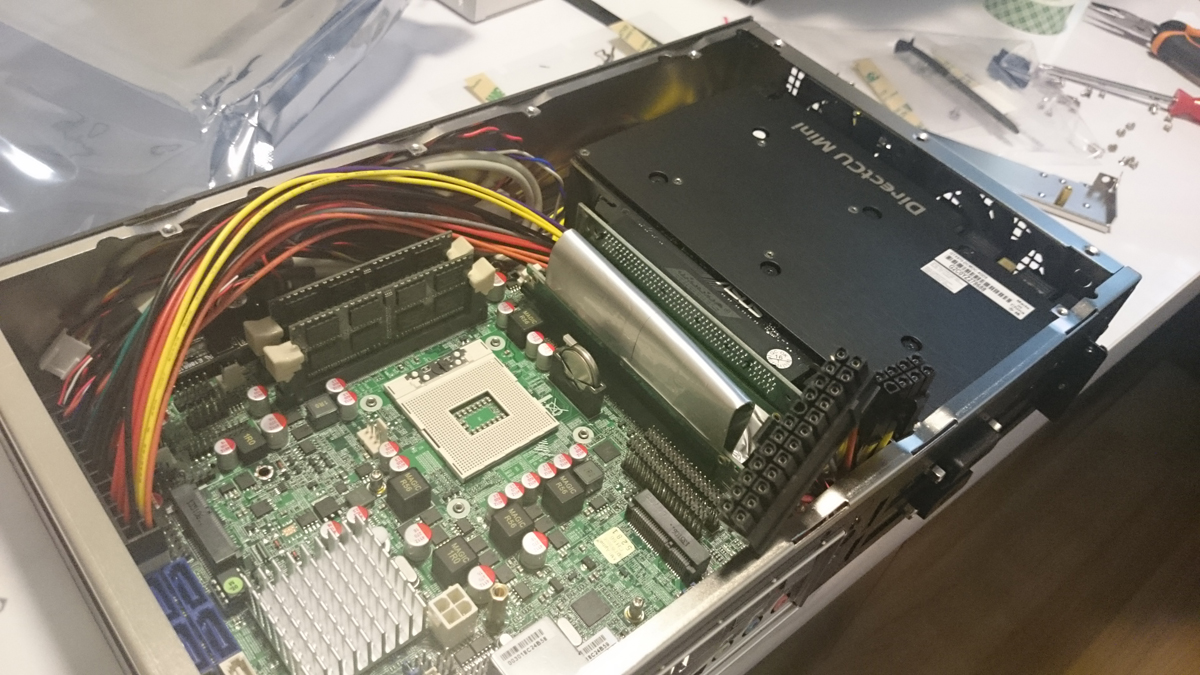
I proceeded with getting the motherboard installed. This turned out to be a pretty easy endeavour, but it quickly became apparent I had very little room left in the case for anything else, and that cable management was going to be a nightmare.
Good thing I went with a mSATA drive instead of a full sized 2.5” SATA one, because it took up absolutely no space at all. Below you can see the Core i5-3210m processor and the 2 sticks of 4GB DDR3 ram I salvaged from the Aftershock in their new home beside the mSATA drive. I can already hear the grizzled veterans telling war stories to the freshly recruited mSATA, “Never been in a gaming system? Ha! You’re in for a ride.”

We’re finishing up now, installing the CoolJag CPU cooler on top of the processor. Then plugging everything in, and leaving the HDPlex suspended above an empty portion of the motherboard behind the IO backplate.

Testing the System
We’re finally ready to test the system! After the usual ritual of installing Windows and Steam. We followed the instructions here to get the machine to boot straight into Steam Big-Picture mode, skipping Window Explorer entirely to save on some memory and boot time. Once that was done, I put away the keyboard and the mouse. The entire interface can now be navigated using just an Xbox 360 wireless controller. Here are some pictures of the finished setup in my living room.

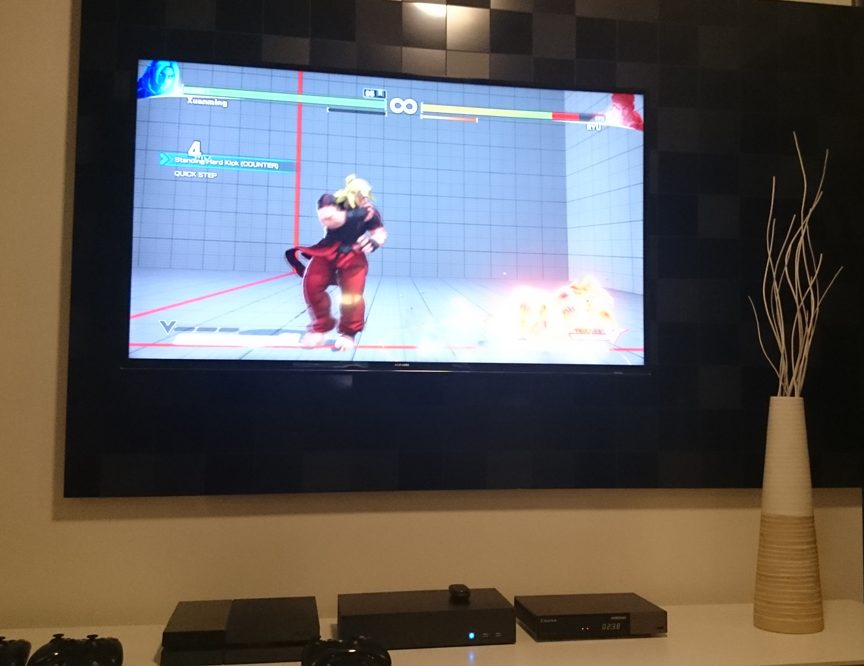
First game tested was Street Fighter V, the game I pretty much built this machine for. Unfortunately, the Steam version of the game doesn’t recognize PS4 arcade sticks such as the TE2 PS4 stick I tried using with it, so I ended up playing the game with an Xbox Controller. The game ran at max settings on 1080p, and maintained 60 FPS throughout the test.
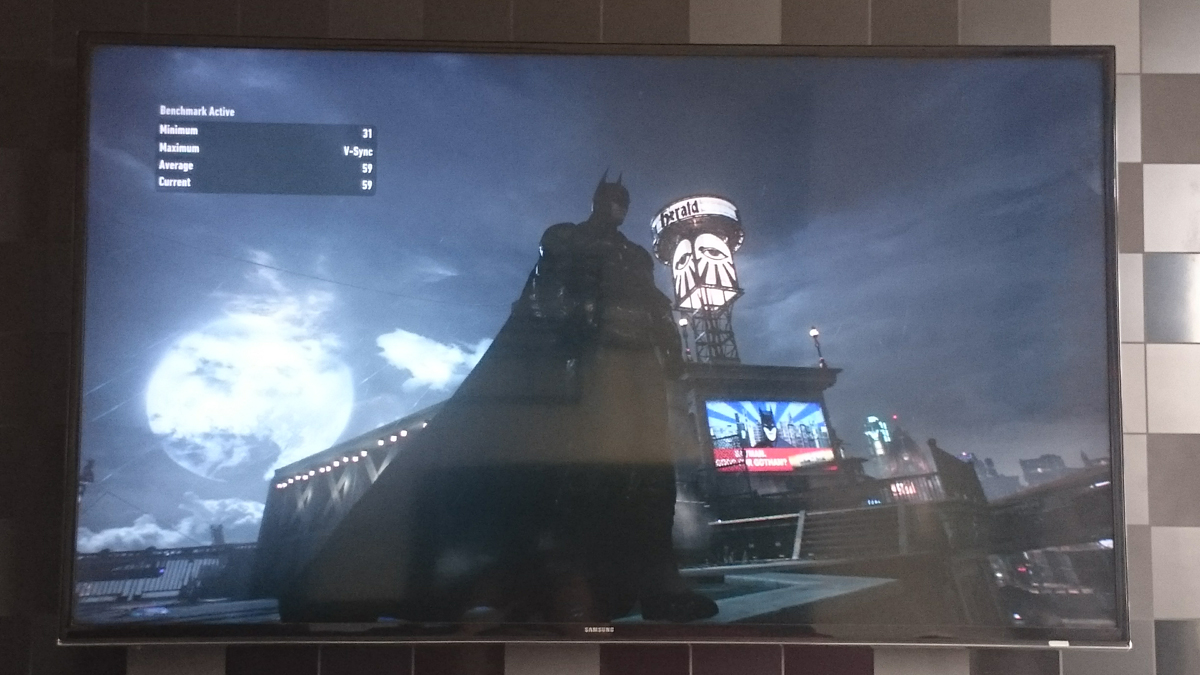
Second game I tested was Batman: Arkham Knight. This game created much controversy when it was first ported to Steam because of a number of issues that caused it to be recalled. The latest patches actually fixed most of the problems and I had a blast playing it. Conveniently, it came with a benchmarking tool that told me the game ran on max settings at 1080p with an average framerate of 59 fps. Not too bad.
Temperatures for the CPU were reasonable (considering such a cramped case). Idle temps were around 50 degrees and load temps after 3 hours of intense gaming was around 70 degrees. I haven’t gotten around to testing the graphic card temps yet, but there were no artefacts when gaming and framerates were smooth.
Conclusion
It wasn’t hard or expensive to build the Steam Box, more of a case of know-exactly-what-you-are-doing. Purchasing wrong parts for the build can be costly or even dangerous, but it’s something that can be solved with decent research. I had friends over to play with the Steam Box and it turns out to be an excellent party activity, especially with incredible local coop games such as Broforce, Rocket League and Helldivers. All the while not compromising on the look of the living room.
If you need more information or want to ask me any questions, I’ve created a small public group on Facebook where we can discuss Steam Box related topics. Have fun gaming!
Xmashed Gear is the place to get all your geek and gamer apparel. We promise the most elite tees you can find this side of New Tristam. www.xmashed.com